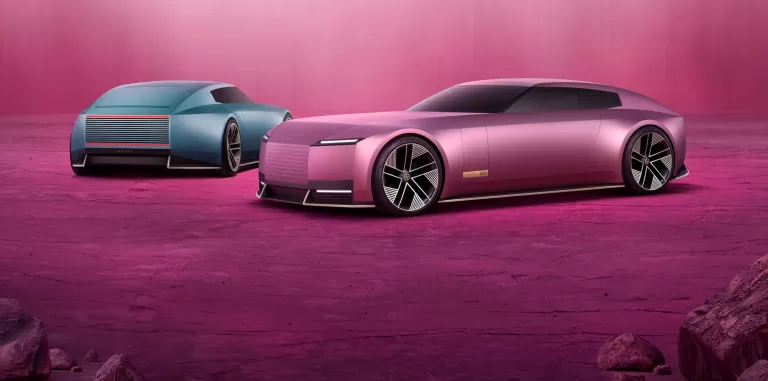

Sunday, May 31, 2026
Home Blog Page 12

High-Performance Batteries: A Catalyst for Africa’s Logistics and Transportation Evolution


Africa’s economic development is deeply intertwined with its transportation infrastructure, where heavy-duty trucks play a pivotal role as the backbone of logistics networks. Parking air conditioners, once considered a luxury, are now increasingly regarded as a necessity, especially for long-haul truck drivers navigating the continent’s vast and diverse geography. The harsh environments and unique logistical challenges faced in Africa demand battery solutions that are not only reliable but also tailored for efficiency, resilience and sustainability.

Let’s look into the advanced battery technologies that address these challenges and explore their potential to transform Africa’s logistics and transportation sectors.

Africa’s Transport Realities: A Complex Landscape

Africa’s transportation sector is characterized by its immense diversity and complexity. The operational challenges faced by truck drivers and fleet operators include:
1. Extreme Weather Conditions: Temperatures that frequently exceed 40°C in the day and drop significantly at night require batteries with exceptional thermal resilience. Dust storms, humidity and uneven road conditions further compound these challenges.
2. Long-Distance Hauls: With some journeys spanning thousands of kilometers, batteries must offer extended durability and reliable performance to ensure vehicles remain operational across remote stretches.
3.Infrastructure Gaps: Limited access to charging facilities and maintenance services in rural and underdeveloped regions necessitates batteries that are efficient, long-lasting and require minimal intervention.

These realities underscore the need for advanced energy solutions that cater to the unique demands of Africa’s logistics ecosystem.

A Technological Leap: Batteries Designed for Africa

To address the specific needs of Africa’s transport sector, Aokly offers two core technologies:

1. Lead-Acid Batteries: The Proven Workhorse

Lead-acid batteries have long been the foundation of energy storage in heavy-duty vehicles, offering a balance of affordability, reliability and simplicity.

Recommended Models:
• N200 (12V 200Ah)
Applications: Heavy-duty trucks, buses, and freight vehicles operating in extreme conditions.
Key Features:
1.  High cold cranking amps (CCA 950-1000) for reliable starts in cold or high-altitude environments.
2.  Rugged construction to withstand vibration, shocks and corrosion common on Africa’s unpaved roads.
3.  Low maintenance requirements, ideal for remote regions.

• N70 (12V 70Ah)
Applications: Medium-duty trucks and basic electrical systems.
Key Features:
1.  Compact size for vehicles with limited installation space.
2.  Reliable charge and discharge performance, even during extended operation.

Why It Matters:
In rural and underserved regions of Africa, lead-acid batteries are a lifeline. Their affordability and straightforward maintenance make them indispensable for powering essential transportation.

2. Lithium Iron Phosphate Batteries: Pioneering the Future

Lithium Iron Phosphate (LiFePO₄) batteries represent a significant technological advancement, offering higher energy density, longer lifespan and exceptional adaptability to harsh environments.

Recommended Models:
• ALFP-24150 (25.6V 150Ah)
Applications: Parking air conditioners in commercial vehicles, RVs and heavy-duty trucks.
Key Features:
1. Cycle Life: ≥4000 cycles at 80% depth of discharge (DOD), providing years of reliable service.
2. Lightweight Design: Reduces vehicle weight, improving fuel economy and payload efficiency.
3. Thermal Resilience: Operates reliably from -20°C to 60°C, making it suitable for diverse African climates.

• ALFP-24200 (25.6V 200Ah)
Applications: High-capacity systems for long-haul trucks and advanced parking air conditioning systems.
Key Features:
1.  High discharge efficiency (99%) ensures optimal energy utilization.
2.  Waterproof and dustproof (IP65) for operation in Africa’s challenging environments.
3.  Supports extended air conditioning use, even during prolonged stops.

Why It Matters:
As Africa’s logistics and transportation industries modernize, lithium batteries provide the reliability and energy efficiency necessary to support increasingly complex operations. Their reduced environmental impact further aligns with global sustainability goals.

Driving Efficiency and Sustainability in Africa

High-performance batteries are more than just energy storage devices; they are enablers of productivity and sustainability in Africa’s transport sector. Here’s how:

1.  Enhanced Driver Comfort and Safety: Batteries that support long-lasting parking air conditioners allow drivers to rest comfortably during mandatory stops, reducing fatigue and improving operational safety.

2.  Lower Carbon Footprint: Lithium batteries, with their extended lifecycle and superior energy efficiency, contribute to the reduction of waste and greenhouse gas emissions.

3.  Economic Sustainability: While lithium batteries may have higher upfront costs, their durability and low maintenance needs translate to significant savings in total cost of ownership (TCO) over time.

The Path Ahead: Building a Sustainable Logistics Ecosystem

Africa’s logistics and transportation sectors are at a pivotal juncture. As the demand for efficient and sustainable solutions grows, choosing the right battery technology will be instrumental in shaping the continent’s economic future.

Lead-acid batteries will continue to serve as a reliable and cost-effective option for basic energy needs, particularly in remote areas. On the other hand, lithium batteries are emerging as the preferred choice for forward-thinking fleet operators looking to invest in longevity, efficiency and sustainability.

At Aokly Battery, we are committed to supporting Africa’s transportation evolution by providing advanced, tailored energy solutions. With a blend of proven reliability and cutting-edge innovation, our batteries are designed to power the future of Africa’s heavy-duty trucks and logistics networks.

By Olivia Zhang

How to Keep Your Car Interior Clean and Well-Maintained


Regular cleaning is the cornerstone of a well-maintained car interior. This doesn’t necessarily mean a deep clean every week, but rather a consistent effort to address minor messes before they become major problems. Here is a routine you can adapt to your lifestyle:

Aim for a weekly quick clean and a more thorough deep clean every few months.

Daily Quick Clean: Take a few minutes each day to remove trash, wipe down spills and address any immediate dirt or debris. This prevents build-up and makes deeper cleaning less arduous.

Weekly Detailing: Dedicate some time each week to a more thorough cleaning. This should include vacuuming carpets and upholstery, wiping down surfaces with an appropriate cleaner and cleaning windows.

Monthly Deep Clean: Once a month, perform a deeper clean that addresses hard-to-reach areas and tackles stubborn stains. This might involve using specialized cleaning products for upholstery, leather or other materials.

Why Car Interiors Get Dirty

Everyday driving exposes your car to a variety of contaminants such as:

Dust and Pollen: These microscopic particles infiltrate through vents, windows and even seemingly sealed compartments.

Crumbs and Debris: Food particles, dirt from shoes and other small debris accumulate on floors, seats and crevices.

Spills and Stains: From coffee to soda, accidental spills can quickly mark your car’s interior if not addressed promptly.

Pet Hair: For pet owners, shedding is an ongoing challenge, requiring regular cleaning and specialized tools.

UV Damage: Sunlight can fade fabrics and damage interior plastics over time, leading to discoloration and cracking.

Wear and Tear: Over time, materials in your car’s interior degrade. This leads to fibers loosening, creating more places for dirt to collect. The wear and tear contribute to a build-up of grime that is harder to remove.

Also Read: Windshield Screens: Essential Cleaning Techniques

Cleaning Your Car Interior

Maintaining a clean car interior is a process best approached systematically. Follow these steps for optimal results:

1. Preparation is Key

Begin by clearing out any unnecessary items. Remove trash, old receipts and anything else cluttering the space. This allows for easier access to all areas during cleaning.

Gather your cleaning supplies: Vacuum cleaner (preferably with attachments): Essential for removing loose dirt and debris.

Microfiber cloths: Gentle on surfaces and effective at picking up dirt.

Interior detailing brushes: Ideal for cleaning tight spaces and crevices.

All-purpose cleaner: Choose a product specifically designed for car interiors. Avoid harsh chemicals that could damage surfaces.

Glass cleaner: For streak-free windows and mirrors.

Leather cleaner and conditioner (if applicable): Essential for maintaining the supple condition and preventing cracking of leather surfaces.

Fabric cleaner and protector (if applicable): Protects fabric seats and upholstery from stains and spills.
Trash bags and wipes.

2. Vacuuming: The Foundation of Cleanliness

Start by thoroughly vacuuming all surfaces, including the floor mats, carpets, seats and crevices. Use the appropriate attachments on your vacuum to reach hard-to-clean areas. Pay close attention to areas where crumbs and debris tend to accumulate, such as under the seats and around the center console.

3. Detailed Cleaning

Once the vacuuming is complete, move on to detailed cleaning. Use your all-purpose cleaner diluted with water (always follow product instructions) and microfiber cloths to wipe down all surfaces. For tougher stains, allow the cleaner to sit for a few minutes before wiping. Use detailing brushes to gently clean hard-to-reach areas, such as air vents and seams.

Also Read: Clean Car, Clear Wallet: Enjoy a Clean Ride and More Money in Your Wallet!

4. Spot Treatment

Address any specific stains or spills using appropriate cleaning agents. For fabric seats, a fabric cleaner is ideal. For leather, use a specialized leather cleaner and conditioner. Always test any cleaning solution on an inconspicuous area first to ensure it doesn’t damage the material.

5. Glass Cleaning

Clean your windows and mirrors with a dedicated glass cleaner, spraying directly onto a microfiber cloth to avoid excessive moisture. Wipe in a circular motion for streak-free results.

6. Leather Care (If Applicable)

Leather requires regular conditioning to maintain its suppleness and prevent cracking. After cleaning, apply a leather conditioner according to the product instructions. This will help to keep your leather seats looking their best for a long time.

7. Final Touches

Once everything is clean and dry, replace floor mats and any other items you removed earlier. Consider using a car air freshener to leave your car smelling fresh and inviting.

Also Read: The Cost-Saving Benefits of Car Detailing

Maintaining Your Car Interior’s Cleanliness

Keeping your car interior clean is not a one-time event; it requires ongoing effort. Here are some helpful tips for maintaining your hard work:

Regular Vacuuming: Vacuum your car’s interior at least once a week, or more frequently if needed.

Prompt Spill Cleanup: Address spills immediately to prevent stains from setting in.

Protect Your Surfaces: Use seat covers or mats to protect your seats and carpets from dirt and spills.

Regular Detailing: Consider professional detailing services every few months for a thorough cleaning.

UV Protection: Use window shades or a sunshade to protect your interior from sun damage.

Why it is Important to Avoid Tailgating


Tailgating is when a driver follows the vehicle in front too closely, leaving no room for safe braking or maneuvering. Some drivers tailgate because they’re in a rush, some do it out of habit and others might just have a lead foot and a lack of consideration for others. It is a frustratingly common sight on urban roads, often fueled by impatience and a disregard for safe driving practices. However, it’s important to understand the risks and consequences.

Why Space Matters

The most fundamental reason to maintain a safe following distance is physics. Your reaction time, the braking distance of your vehicle and the braking distance of the vehicle in front are all critical factors. Even if you react instantly to a sudden stop, your vehicle requires a significant amount of space to come to a complete halt. Tailgating drastically reduces this crucial braking distance, leaving you with little to no time or space to react safely to unexpected events.

The distance is not a fixed number; it varies depending on road conditions, speed and your vehicle’s capabilities. If the car ahead brakes suddenly, you need sufficient distance not only to stop your vehicle but also to avoid rear-ending them. The faster you are traveling, the longer the stopping distance. This distance is influenced by factors such as road conditions (wet, icy or dry), your vehicle’s braking system and tyre condition. Tailgating drastically diminishes the margin for error inherent in these calculations, making even minor incidents potentially dreadful.

Consider this scenario: You are traveling at 60 mph (96 km/h). Your reaction time is one second. In that single second, your vehicle travels approximately 88 feet (27 meters). Your reaction time alone (the time it takes to perceive the hazard and begin braking) is typically around 1.5 seconds. During that time, you’ll travel approximately 40 meters. Then, depending on your vehicle’s condition and road surface, your braking distance could easily add another 30-50 meters, or even more in poor weather conditions. If you’re tailgating, this leaves you no room to avoid a collision.

Risks and Dangers of Tailgating

The dangers of tailgating extend far beyond simply reducing braking distance. Consider these additional risks:

Reduced Visibility: Tailgating limits your ability to see the road ahead clearly. You’re focusing primarily on the vehicle directly in front, potentially missing crucial information about traffic flow, road hazards (e.g., debris, animals), or emergency vehicles.

Increased Risk of Rear-End Collisions: This is the most obvious and prevalent danger. Rear-end collisions are often the result of tailgating and account for a substantial percentage of traffic accidents each year. These collisions can range from minor fender benders to tragic events resulting in serious injury or death.

Chain Reaction Accidents: In heavy traffic, a single rear-end collision caused by tailgating can trigger a chain reaction, involving multiple vehicles and significantly compounding the damage and injuries. Imagine a scenario where a car brakes suddenly, the tailgating vehicle crashes into it and that impact sends the first car into the vehicle ahead. This cascade effect can rapidly escalate into a multi-vehicle pile-up, leading to severe damage, injuries, and significant traffic disruption.

Aggressive Driving Behavior: Tailgating often correlates with other forms of aggressive driving, such as speeding, erratic lane changes and improper passing. This aggressive driving style increases the likelihood of accidents and creates a hostile driving environment for everyone on the road.

Legal Ramifications: In many jurisdictions, tailgating is considered a traffic violation, potentially leading to fines, points on your driving record and even license suspension. In the event of an accident, tailgating can be a contributing factor that significantly impacts legal liability. If you are found to be at fault for an accident caused by tailgating, you could face significant legal and financial repercussions.

How to Avoid Tailgating and Stay Safe

The solution to the dangers of tailgating is simple; maintain a safe following distance. While the specific distance may vary depending on factors like speed and road conditions, a good rule of thumb is the “three-second rule.” Choose a fixed object ahead (e.g., a signpost, a tree) and count three seconds after the vehicle in front passes it. If you reach the same spot before you finish counting, you’re following too closely. However, as mentioned, this rule should be adjusted based on road conditions, weather and speed.

For instance, on wet or icy roads, or in poor visibility, increasing your following distance to five or even more seconds is advisable.

Beyond the three-second rule, consider these additional tips for safe driving:

Adjust your speed: Reduce your speed in adverse conditions like rain, snow or fog. This increases your braking distance and gives you more time to react.

Be aware of your surroundings: Pay attention to the traffic around you, anticipating potential hazards and leaving yourself ample space to maneuver.

Avoid distractions: Put away your phone, turn down the music and focus on driving.

Practice patience: Allow extra time for your journey and avoid the temptation to rush. Impatience is a significant contributing factor to tailgating.

Maintain your vehicle: Ensure your brakes and other safety systems are in good working condition.

As much as tailgating is a reckless and dangerous driving habit with significant consequences, it is a preventable hazard. The extra few seconds it takes to maintain a safe following distance are far less significant than the potential consequences of a collision. By Implementing safe driving practices, you can contribute to a safer driving environment for yourself and others. Choose safety; avoid tailgating!

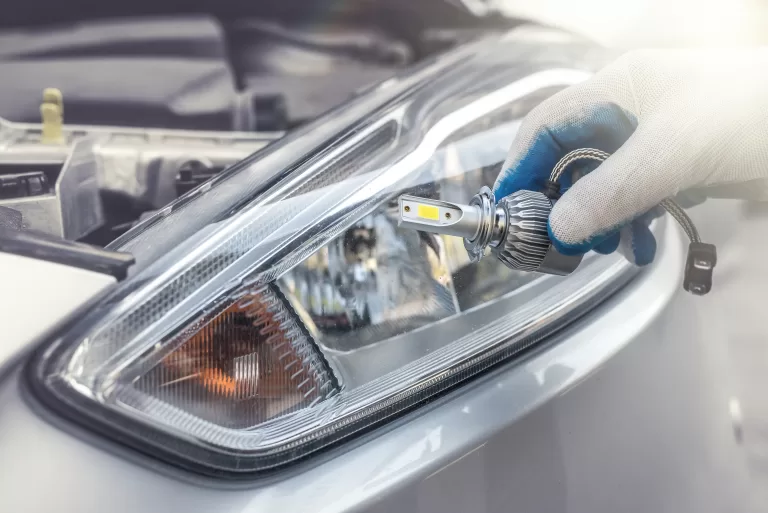
How to Replace Your Headlight Bulbs


Driving at night relies heavily on your vehicle’s headlights. A burned-out headlight bulb not only compromises your visibility but also significantly reduces your safety and the safety of others. While a mechanic can certainly replace your headlight bulb, it’s a surprisingly simple task you can often handle yourself, saving you time and money. However, your vehicle’s specific design will influence the exact procedure, so always consult your owner’s manual for detailed instructions tailored to your make and model.

Before You Begin: Safety First!

Before even touching your vehicle’s lighting system, ensure your vehicle is parked on a level surface, the engine is off and the parking brake is engaged. Never work on your car’s electrical system while the engine is running. Also make sure the headlights are off and the bulbs have cooled completely before handling them. Use gloves to protect your hands from grease and potential cuts.

Step 1: Identifying Your Headlight Bulb Type

The first step is identifying the type of headlight bulb your vehicle uses. This information is crucial as it dictates the correct replacement. Your owner’s manual will specify the exact bulb type (e.g., H7, H11, 9005, etc.). Failing to use the correct bulb can lead to improper fitment, reduced light output, or even damage to your vehicle’s electrical system. You can also find this information on the bulb itself, if it’s easily accessible.

Step 2: Gathering Your Tools and Materials

To replace your headlight bulb, you’ll need a few basic tools. These include:

New Headlight Bulb: Ensure you purchase the correct bulb type, as identified in Step 1. Buying a quality bulb from a reputable automotive parts supplier is recommended for optimal performance and longevity.

Gloves: Protect your hands from grease and possible cuts.

Owner’s Manual: This will provide specific instructions and diagrams for your vehicle.
Appropriate Socket/Wrench (if needed): Some headlight assemblies require specialized tools to remove the bulb housing. Your owner’s manual will normally specify what tools you need if this is the case.

Flashlight: This will help illuminate the area you’re working on, especially in low-light conditions.

Towel or Rag: This can be used to clean surfaces and prevent grease from damaging the new bulb.

Step 3: Accessing the Headlight Assembly

The method for accessing your headlight assembly varies significantly depending on your vehicle’s make and model. Your owner’s manual will provide the most accurate instructions. Common access methods include:

Direct Access: In some vehicles, the bulb is accessible after simply opening the hood and removing a protective cover.

Removing the Headlight Assembly: More complex designs may require removing the entire headlight assembly; this often involves loosening fasteners and carefully disconnecting electrical connectors.

Step 4: Removing the Old Headlight Bulb

Once you have access to the bulb, carefully disconnect the electrical connector. This is usually a simple clip or twist-lock mechanism. Then, depending on your bulb type and vehicle design, you may need to twist the bulb to release it or use a retaining clip. Always take the time to study your bulb and how it fits in the housing before attempting to remove it. Avoid touching the glass of the bulb itself with your bare hands, as oils from your skin can reduce its lifespan.

Step 5: Installing the New Headlight Bulb

Carefully insert the new headlight bulb into the housing, ensure it aligns correctly and seated firmly engaging properly with any retaining clips. Reconnecting the electrical connector should be straightforward.

Step 6: Testing and Reassembly

After installing the new headlight bulb, carefully reassemble the headlight assembly. Turn on your headlights to verify the new bulb is functioning. Check both the low and high beams to ensure the new bulb is functioning correctly. If the new bulb does not work, double-check your connections and ensure you’ve installed the correct bulb type.

Step 7: Disposal of Old Bulb

Used headlight bulbs should be disposed of responsibly. Check with your local waste management facility for proper disposal instructions.

Replacing your headlight bulb is a manageable task that can save you both time and money. However, while this guide provides general instructions, your specific vehicle may have variations in the process. Always refer to your owner’s manual for detailed, model-specific instructions.

Taking the time to understand your vehicle’s unique features will ensure a safe and successful headlight bulb replacement and enhance your vehicle’s safety and visibility. Nonetheless, if you feel uncomfortable or are unsure about any step of the process, it’s always best to consult a qualified mechanic.

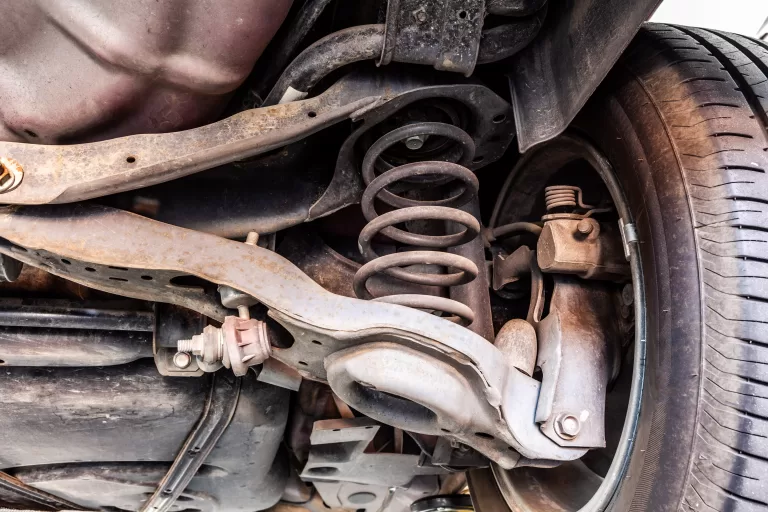
Signs of a Failing Control Arm


A control arm is an important component of your vehicle’s suspension system, it connects the steering knuckle to the vehicle’s frame. Its primary function is to provide stability and support while allowing the wheels to move up and down with the road’s surface. Control arms usually come in pairs, with one on each side of the vehicle’s axle.

Several symptoms can indicate that your control arms are nearing the end of their lifespan or have sustained damage. These signs often manifest gradually, making early detection challenging but crucial. Here are some key indicators that you should be aware of:

Signs of a Failing Control Arm

Steering Wheel Vibration: A failing control arm can cause your steering wheel to vibrate, especially when driving at high speeds. This vibration is caused by the loose or worn-out bushings in the control arm, which can no longer absorb the shock and vibration effectively.

Uneven Tyre Wear: Uneven tyre wear can lead to more severe problems to the vehicle. The control arm is responsible for maintaining the proper alignment of your wheels and if it’s failing, your wheels may become misaligned, leading to uneven tyre wear.

Noisy Suspension: If you hear clunking, knocking or creaking noises coming from your suspension system, it could be a sign of a failing control arm. These noises can be caused by loose or worn-out bushings, which can no longer provide the necessary support and cushioning when going over bumps or turning. Note when these sounds occur—is it more pronounced at low speeds, during turns or when driving over uneven surfaces? This information will be helpful when describing the problem to a mechanic.

Steering Pull: If your vehicle tends to pull to one side while driving, it could be a sign of a failing control arm. This steering pull can be caused by misalignment, which can result from a loose or worn-out control arm.

Unstable Vehicle: A failing control arm can also cause your vehicle to become unstable, especially when driving at high speeds or making sharp turns. This instability can be caused by the control arm’s inability to provide the necessary support and stability.

Why You Should Address these Signs Promptly

If you notice any of the signs mentioned above, it is important to seek professional help immediately. A qualified mechanic can perform a thorough inspection of your control arms, bushings and ball joints, using specialized tools to detect even subtle signs of wear. He/she can determine the extent of the damage and recommend the necessary repairs or replacements.

Delaying repairs can lead to more extensive and expensive damage, compromising your safety and potentially causing an accident. Prioritize getting your vehicle inspected if you suspect a failing control arm ensuring that your vehicle remains safe and roadworthy. Do not continue driving your vehicle if you suspect a serious problem with your suspension system.

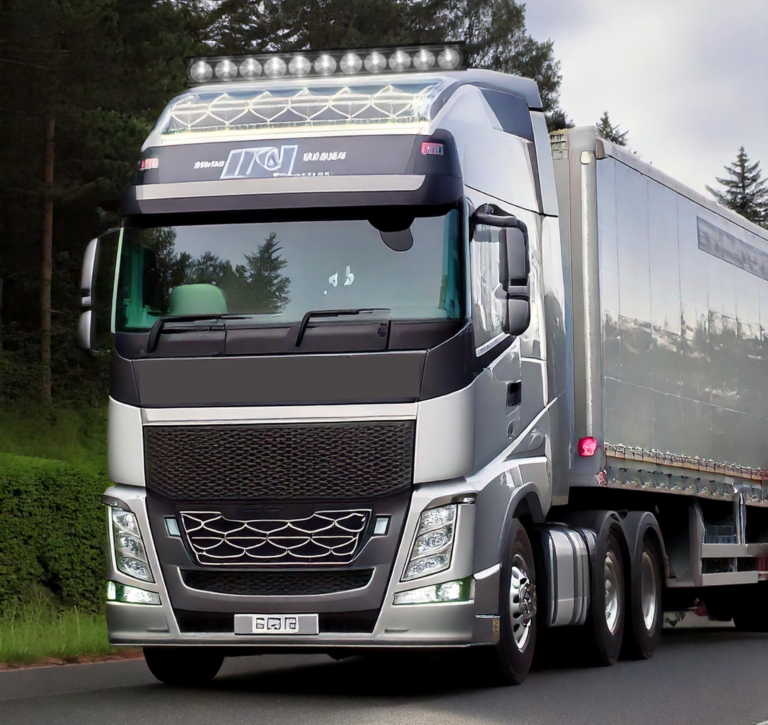
Why Light Bars Are Important for Heavy Truck Drivers During Nighttime Driving


Nighttime driving presents unique challenges for all motorists, but for heavy truck drivers, the stakes are significantly higher. The sheer size and weight of these vehicles, coupled with longer stopping distances and reduced visibility, demand enhanced safety precautions. This is where light bars become a non-negotiable element in ensuring safe and efficient nighttime operation. You might already be aware of their benefits, but understanding the specific reasons why they are essential for your safety and the safety of others warrants closer examination. Beyond simply illuminating the road, light bars offer several other benefits crucial for heavy truck drivers:

Enhanced Peripheral Visibility

One of the most significant advantages of light bars for heavy truck drivers is the considerable improvement in visibility. Compared to standard headlights, light bars offer a vastly wider and more intense beam pattern. This expanded field of vision allows you to identify potential hazards – pedestrians, animals, debris or other vehicles – much earlier than you would with standard lighting. Imagine navigating a winding mountain road at night, or approaching an intersection with limited street lighting. The superior illumination provided by a light bar significantly reduces the risk of accidents by increasing your reaction time.

The increased visibility isn’t just beneficial for you; but also safeguards your passengers (if applicable) and the valuable cargo you are transporting. A brightly lit truck is easier for other drivers, especially those in smaller vehicles, to see and anticipate. This is especially crucial on multi-lane highways where merging and overtaking maneuvers occur frequently. Being clearly visible reduces the chance of rear-end collisions or other potentially tragic accidents.

Reduced Driver Fatigue

Driving at night is inherently tiring. The strain on your eyes is amplified by poor visibility. Light bars, reduce eye strain and fatigue, contributing to safer and more alert driving.

Adjustable Brightness and Beam Patterns
Beyond the enhanced visibility, light bars offer several other practical benefits for heavy truck drivers. Many modern light bars boast features like adjustable brightness and beam patterns, allowing a driver to customize the illumination based on weather conditions and road types. In heavy rain or fog, a lower intensity beam might be more effective in preventing glare and maximizing visibility through the elements. Equally, on clear, dark nights, you can utilize the full power of the light bar to extend your sight range.

Durability

The durability of light bars is another compelling reason for their adoption. Designed to withstand the rigors of heavy-duty trucking, they are generally constructed from robust materials resistant to vibrations, impacts and harsh weather conditions. Light bars are also built to last, providing long-term reliable illumination. This means fewer replacements and less downtime, ultimately contributing to increased efficiency and cost savings.

Commitment to Safety

Moreover, investing in high-quality light bars demonstrates a commitment to safety, which can be a significant asset in reducing insurance premiums. Insurance companies often recognize the proactive approach to safety that incorporating light bars represents, potentially leading to favorable rates for those who prioritize safety enhancements. This underscores the practical financial benefits beyond just the immediate safety improvements.

The choice of light bar is crucial. You should look for a light bar that meets or exceeds your specific needs and complies with all relevant regulations. Consider factors like the wattage, beam pattern (spot, flood or combination) and mounting options. Consult with a trusted supplier or mechanic to ensure you select a light bar that is compatible with your truck and meets required safety standards. Investing in a high-quality light bar from a reputable manufacturer is a cost-effective way to significantly enhance your safety and reduce the risk of accidents.

The benefits of light bars must be considered alongside the importance of responsible usage. Avoid using excessively bright settings in situations where they could impair the vision of other drivers, thereby negating the safety advantages.

How to Check and Change Your Differential Fluid


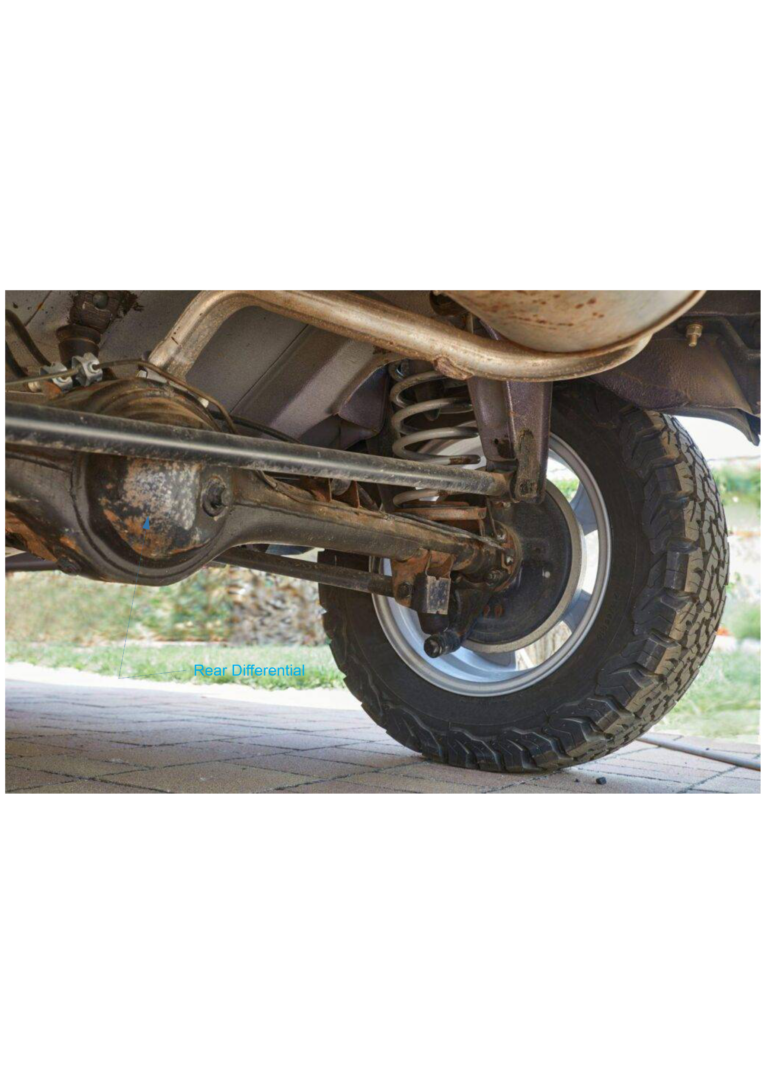
The differential fluid also known as gear oil, lubricates the gears and bearings within the differential, reducing friction and wear. It also distributes power efficiently to the wheels for smooth turns and optimal traction. This lubrication minimizes heat generation, preventing damage from excessive temperatures. Furthermore, the fluid acts as a sealant, preventing contaminants like dirt and water from entering the differential housing and causing damage.

Assessing Your Differential Fluid’s Condition

Before embarking on a fluid change, you need to assess the current condition of your differential fluid. This involves a simple visual inspection and a check of its consistency. Locate the differential drain plug, usually found on the bottom of the differential housing – consult your vehicle’s owner’s manual for the precise location. Carefully remove the filler plug first (often located near the top of the housing). This is crucial to avoid overfilling once the fluid is drained.

When to Seek Professional Help

Some situations necessitate professional help. If you observe any of the following, consult a qualified mechanic immediately:

Significantly low fluid level: This points to a leak that needs immediate repair to prevent disastrous damage.

Fluid showing signs of significant contamination (water, metallic particles): This indicates potential internal damage requiring expert diagnosis and repair.
Unusual noises or vibrations emanating from the differential: These could signify a range of problems, from worn gears to bearing failures.

Burnt smell or excessively dark fluid: This signifies potential overheating and possible damage.

Gathering Necessary Supplies

Once you’ve determined the condition of your differential fluid and decided on a change, you’ll need to gather the necessary supplies. This includes:

New differential fluid: Purchase the correct type and quantity of fluid specified in your owner’s manual. Using the wrong type of fluid can damage your differential. New differential fluid is typically a reddish-amber color.

Drain pan: A suitable container large enough to hold the old fluid.

Wrenches: The correct sized wrenches for both the drain and filler plugs.

Funnel: A funnel will prevent spills during refilling.

Jack and jack stands (or ramps): To safely lift your vehicle and provide secure access to the differential.

Gloves and safety glasses: Always prioritize your safety. Used differential fluid can be messy and potentially harmful.

Torque wrench (recommended): To ensure the drain and filler plugs are tightened to the manufacturer’s specifications. Over-tightening can damage the threads; under-tightening can lead to leaks.

Towels or rags: To clean up any spills.

Changing Your Differential Fluid: A Step-by-Step Guide

Before you begin, ensure your vehicle is parked on a level surface, the engine is off, and the parking brake is engaged.

Securely lift your vehicle: Use a jack and jack stands, or ramps to lift the vehicle safely. Ensure it is stable and secure before proceeding. Never work under a vehicle supported only by a jack.

Locate and remove the drain plug: Position the drain pan beneath the drain plug and carefully loosen and remove the plug, allow the old fluid to drain completely. Dark, murky or metallic-looking fluid indicates significant wear and contamination, necessitating an immediate fluid change. A gritty or foul-smelling fluid further points to internal damage, requiring professional inspection.

Remove the filler plug: This is essential to allow air to escape as the fluid drains.

Inspect the drain plug and magnetic drain plug (if equipped): Check for any metal particles or debris, which may indicate internal wear. Clean the plug before reinstalling.

Replace the drain plug: Once the old fluid has drained, replace the drain plug. It’s crucial to tighten it to the proper torque specification, as specified in your owner’s manual. Using a torque wrench prevents over-tightening or under-tightening, both of which can lead to leaks or damage.

Refill with new fluid: Using a funnel, carefully pour the correct amount of new differential fluid into the filler hole. Refer to your owner’s manual for the precise quantity.

Check the fluid level: Once filled, you might need to use a fluid level checker or simply check the level via the fill hole. The fluid level should reach the fill hole or slightly below it, depending on your vehicle’s specifications.

Replace the filler plug: Tighten the fill plug to the manufacturer’s specified torque.

Lower your vehicle: Carefully lower your vehicle and remove the jack and stands.

Dispose of used fluid properly: Used differential fluid should be disposed of according to local regulations. Never pour it down the drain or onto the ground.

Post-Fluid Change Inspection: After driving for a short distance, re-check for any leaks around the drain and fill plugs. Listen for any unusual noises emanating from the differential. If you notice any leaks or unusual sounds, consult a mechanic immediately.

Regular Maintenance is Key

Regularly checking and changing your differential fluid is an essential part of responsible vehicle ownership and simultaneously maintaining the health and longevity of your vehicle’s drivetrain. Consult your owner’s manual for the recommended fluid change intervals and significantly extend the life of your differential and ensure trouble-free driving for years to come. Nonetheless, if you are uncomfortable performing this task yourself, seek professional assistance from a qualified mechanic.

Light Commercial Oil Filters-Key Considerations for Top Performance


When managing a fleet of light commercial vehicles, every choice you make can have significant consequences on both efficiency and cost-effectiveness. Among the key decisions, is selecting the right oil filters, as it can directly impact engine efficiency, oil quality and overall operational costs.

Abderrahmane Mairi, Chief Operations Officer – Winpart by CFAO Mobility – Kenya
Abderrahmane Mairi, Chief Operations Officer – Winpart by CFAO Mobility – Kenya |Image: Winpart by CFAO Mobility

“Oil filters are vital in all vehicles, capturing contaminants that can damage sensitive systems and hinder performance. For commercial fleets, maintaining filters in preventive maintenance plans is crucial in ensuring uptime and efficiency,” says Abderrahmane Mairi, Chief Operations Officer – Winpart by CFAO Mobility – Kenya.

Mairi further emphasizes that, “The engine oil filter is a key component of a car engine’s lubrication system. It removes impurities and dirt particles present in the engine oil, ensuring the engine remains clean and well lubricated. This protection reduces wear, prevents overheating caused by friction, and extends engine lifespan.”

Additionally, your decision in selecting oil filters should be guided by the specific needs of your fleet. Various factors must be evaluated to make an informed decision. But how do you ensure you are picking the right oil filter for your fleet?

Factors You Must Evaluate When Selecting Oil Filters for Light Commercial Fleet

According to Mairi, “Selecting the right oil filters is not merely a purchase decision but a strategic investment in fleet efficiency and sustainability.” It also involves careful consideration of various factors to ensure you are getting the best value and functionality for your vehicles. Here are some essential factors to consider when selecting oil filters for your light commercial fleet:

1. Compatibility with Vehicle Specifications

First and foremost, it’s essential to ensure that the oil filters you select are compatible with the vehicles in your fleet. Each light commercial vehicle may have different requirements based on its make and model, engine type and oil specifications. Before purchasing oil filters, consult your vehicle’s owner manual or manufacturer guidelines to find the specific filter types recommended. Investing in filters that fit your vehicles ensures optimal engine function and filtration efficiency.

2. Filtration efficiency

Not all oil filters are created equal. Filtration efficiency refers to a filter’s ability to remove contaminants from the engine oil. When selecting oil filters, look for those that can effectively capture sediment, dirt and other harmful particles. High-quality filters typically have finer filtration ratings, which means they will trap smaller particles that could cause engine wear.

3. Brand Reputation and Quality Assurance

As a fleet manager it is wise to consider the brand’s reputation. Well-established brands often provide better quality assurance and reliability. Look for manufacturers known for producing durable, high-performing filters that meet industry standards. Even if you face tempting deals on less-known brands, remember that cutting costs on oil filters may lead to faulty performance and unnecessary repairs down the road.

4. Filter Design and Construction

The design and construction of an oil filter is an important feature in its efficiency and durability. Here are a few characteristics to look for:

Media Type: The filter media, where oil passes through, impacts how well contaminants are captured. Synthetic filter media is often superior to paper filters for they are better at dirt-holding capacity and filtration efficiency.

Bypass Valve: Some filters come with a bypass valve that allows oil to bypass the filter if it becomes clogged. This feature is vital to maintain oil flow to the engine during extreme conditions.

End-Caps: Quality filters have robust end-caps that contribute to overall durability and prevent leakage. Look for filters with durable materials that can withstand engine conditions.

5. Cost Efficiency

While price should not be the sole deciding factor in your oil filter selection, it is certainly essential to consider cost efficiency. Calculate the total cost of ownership by assessing how long the filter lasts, its performance and how it impacts overall vehicle maintenance costs. Sometimes, investing a little more in higher-quality filters can save you money down the line through reduced maintenance needs and prolonged engine life.

6. Maintenance Intervals

Consider your fleet’s maintenance approach when selecting oil filters. If your light commercial vehicles follow an aggressive maintenance schedule with frequent oil changes, you might prioritize filters that handle frequent replacements easily. On the other hand, if your fleet operates on longer service intervals, you may need filters designed for extended life. “For older model vehicles operating in extreme conditions, such as dusty environments or with frequent cold starts, it is recommended that the oil filter be changed more frequently, typically every 5,000 or 10,000 km,” affirms Mairi. “We emphasise the importance of regular oil filter replacement to ensure optimal engine performance and longevity,” he adds. Moreover, choosing the right filter based on your maintenance intervals can also optimize time and costs in managing your fleet.

7. Supplier Support and Availability

Consider the availability of the oil filters you choose and the support provided by the supplier. Establishing a reliable relationship with a supplier who understands your fleet’s specific needs can simplify the procurement process. A good supplier will not only offer quality products but also provide educational resources and support to ensure that you make informed decisions about your oil filter purchases.

8. Environmental Considerations

In today’s environmentally conscious world, sustainable practices are becoming increasingly important. Selecting products made from recyclable materials or those that adhere to strict environmental standards can contribute to your fleet’s sustainability goals. Eco-friendly options can also attract clients who value responsible practices, giving your fleet a competitive edge.

9. Temperature and Pressure Ratings

Light Commercials often operate under varying conditions, which might include extreme temperatures and fluctuating pressures. Make sure to choose oil filters that can withstand the specific operating temperature range of your fleet’s vehicles. An oil filter that can perform well under high thermal stress will prevent premature failure and ensure longevity.

10. Ease of Installation

Finally, consider the ease of installation when selecting oil filters for your LCV fleet. Some filters are designed for easy replacement, while others might require special tools or expertise. Choosing a filter that can be easily installed can save you time and money when it comes to maintenance. This is especially important for fleet operations where downtime can be detrimental to business.

As the stakes rise in a competitive marketplace, fleet operators must challenge the notion that cost is the sole criterion in oil filter selection if they aim to achieve sustainable operational excellence.

As Mairi concludes, he strongly advocates for cost-effectiveness and performance stating that, “We advocate for solutions that balance cost-effectiveness with performance. This aligns with our commitment to providing reliable automotive solutions across Africa with all our brands.”

High quality oil filters can enhance engine performance, extend the life of your fleet and reduce the operational costs associated with maintenance. For businesses that rely on their vehicles for daily operations, ensuring your vehicles runs smoothly with the right oil filters is a decision you simply cannot afford to overlook.

Mansour and SAIC Motor to establish manufacturing plant in Egypt


Prime Minister Mostafa Madbouly attended a signing ceremony for a groundbreaking agreement between Mansour Group and China’s SAIC Motor. The agreement involves the establishment of a US$135 million automotive manufacturing plant in Egypt. This plant will produce MG cars locally and will be located in New October City.

New Factory Details

The factory is expected to cover 126,000 square meters in the industrial zone of New October City. This project will greatly benefit Egypt’s automotive sector by increasing local production capacity and supporting the country’s strategy to localize vehicle manufacturing.

Prime Minister’s Praise

Prime Minister Madbouly praised the initiative, highlighting the job creation, technological transfer, and increased local content of vehicles that the new factory will bring. He emphasized that this project is a significant step in implementing Egypt’s national strategy for the automotive industry.

Key Officials Present

Key officials, including Deputy Prime Minister Kamel Al-Wazir and Minister of Investment Hassan El-Khatib, were present at the signing ceremony.

Project Details

Under the agreement, production is set to begin in the second quarter of 2026, with an initial output of 50,000 units annually. The goal is to scale up to 100,000 units in phase two of the project. The factory will focus on exceeding 45% local content to reduce dependence on imports and strengthen the domestic automotive supply chain.

Advanced Capabilities

The factory will feature specialized units such as a body shop, a high-tech paint workshop, a general assembly line, and a comprehensive warehouse. It will offer a range of transportation solutions, contributing to the broader automotive ecosystem.

Modern Facilities

The factory will be equipped with modern facilities meeting international standards, including a body shop, paint workshop, assembly workshop, and warehouse.

Job Opportunities

Mansour Group plans to create significant job opportunities directly at the factory and within the supply chain. This project will play a pivotal role in supporting Egypt’s industrial development and the growth of its automotive sector.

Strategic Partnership

The partnership between Mansour Group and SAIC Motor highlights the growing economic ties between Egypt and China, solidifying Egypt’s position as a regional hub for automotive manufacturing.

Jaguar unveils Type 00, A Stunning Blend of Elegance and Power


Introducing an unmistakable, unexpected and dramatic physical manifestation of Jaguar, as the brand continues its transformation. Type 00 (pronounced Type Zero Zero) embodies Jaguar’s creative philosophy of Exuberant Modernism following the debut of its new brand identity.

The world premiere of the design vision concept at Miami Art Week – as South Florida becomes the centre of the art world for six-days – previews what’s to come from Jaguar, as the brand recaptures the original ‘Copy Nothing’ ethos of its founder, Sir William Lyons.

Adrian Mardell, Chief Executive Office, JLR, said: “The magic of Jaguar is close to my heart – an original British luxury brand unmatched in its heritage, artistry and emotional magnetism. That’s the Jaguar we are recapturing and we will create the same sense of awe that surrounded iconic models like the E-type. Our journey is already underway, guided by our original ethos to Copy Nothing – and the results will be spectacular.”
In Miami, Jaguar’s transformation into an electric-only brand with an elevated family of highly desirable and exclusive new luxury vehicles continues. This transition extends beyond the products Jaguar designs and engineers; it represents a reimagination of the entire brand.

Rawdon Glover, Managing Director, Jaguar, said: “We have forged a fearlessly creative new character for Jaguar that is true to the DNA of the brand but future facing, relevant and one that really stands out.”

World premiere: Type 00

Introducing Type 00. The physical manifestation of Jaguar’s new creative philosophy – Exuberant Modernism.

The ‘Type’ prefix is a link to the brand’s provenance, to models like the pioneering E-type. The first zero references zero tailpipe emissions. The second represents its status as car zero in our new lineage. Its visionary design defies electric vehicle convention with a long bonnet, sweeping roofline, 23-inch alloy wheels, fastback profile and boat-tail to create a dramatic silhouette with sophisticated, modernist surfaces. This design was enabled by our unique and dedicated architecture

JEA (Jaguar Electrical Architecture).

Professor Gerry McGovern OBE, Chief Creative Officer, JLR, said: Type 00 is a pure expression of Jaguar’s new creative philosophy. It has an unmistakable presence. This is the result of brave, unconstrained creative thinking, and unwavering determination. It is our first physical manifestation and the foundation stone for a new family of Jaguars that will look unlike anything you’ve ever seen. A vision which strives for the highest level of artistic endeavour.”

Exuberant Modernism

Jaguar’s new creative philosophy is founded on three fundamental characteristics and expressed in every part of the brand and everywhere it appears – represented in both a new artistic visual identity and the way it builds relationships with clients.

  • Exuberant. Vibrant, uninhibited and fearless. In the vehicles it creates and moments it curates
  • Modernist. Future-facing, curious and inspired by the world. Respectful of the past, not dictated by it
  • Compelling. Holistic, sensory and extraordinary. Generating meaningful connections with clients
Capturing the Spirit of Jaguar

Type 00 is a prelude to a future generation of Jaguars that will recapture the spirit and essence of the brand at its best. Our start point was a blank sheet of paper from both a design and engineering perspective. A new and unique architecture, JEA, was developed from scratch to enable the dramatic design of Type 00. This dedicated technology platform will ensure clients experience a captivating driving experience, engaging handling and exemplary ride comfort.

The latest electrification technologies and awe-inspiring designs will make future Jaguars stand out in an increasingly homogenous EV market.

Built in the UK, the first new-generation production Jaguar will be a four door GT to be revealed in late 2025. It will target a driving range up to 770km WLTP* or 692km EPA*, on a single charge and adding up to 321km of range in as little as 15 minutes when rapid charging.*

Exclusive brand stores
Jaguar will come to life in a select number of exclusive brand stores for clients around the world. These environments will present an immersive step into the world of Jaguar, embracing their setting and local culture and be complemented by a wider global network of luxury retailers. Jaguar’s first new brand store will be in the heart of the luxury fashion district of Paris, in the 8th arrondissement.

Dramatic exterior

The confident new face combines upright, flush surfaces with the new Jaguar device mark at its centre. A distinctive and precise front light signature emphasises the corners of the car, giving width and grounding it.

The side profile is dominated by bold proportions, with the Jaguar ‘leaper’ laser-etched into a hand-finished brass ingot on each side of the car. These ingots theatrically deploy to reveal rear-facing cameras that – like the charging ports and front air intakes – remain hidden until needed.

The rear continues the bold statement. A glassless tailgate and panoramic body-harmonised glazed roof create a sense of sculpture. The rear elevation is defined by distinctive horizontal Strikethrough graphics, which hide dramatic full-width taillights and emphasise the power and scale of Type 00.

Constantino Segui Gilabert, Chief Exterior Designer, Jaguar, said: “Jaguar is no place for ordinary. When you see a new Jaguar for the first time, it must have a sense of awe, of never having been seen before. Type 00 commands attention, like all the best Jaguars of the past. It has a dramatic presence, channelling a unique spirit of British creativity and originality. It celebrates art and embodies the essence of Exuberant Modernism.”

Just as a pair of E-types attended its 1961 launch at the Geneva Motor Show, the reveal of Type 00 celebrates two contrasting interpretations of Jaguar’s new design vision. A Satin Rhodon Rose example – dubbed ‘Miami Pink’ in honour of the pastel colours of the city’s iconic Art Deco architecture – is inspired by the distinctive rose colour that brass takes on as it ages. It is joined by a striking Inception Silver Blue model. Dubbed ‘London Blue’, it is inspired by the Opalescent Silver Blue of the 1960s and was chosen to reflect Jaguar’s British heritage.

Captivating interior

A pair of dramatic butterfly doors and ‘pantograph’ tailgate open to reveal a modernist interior that shares its exuberant proportions with the exterior. The awe-inspiring cabin features three hand-finished brass lines which run the length of the interior, with a central 3.2m-long brass spine that splits a pair of floating instrument panels.

Mary Crisp, Chief Materiality Designer, Jaguar, said: “The Materiality ideology for Type 00 embraces authentic, unexpected materials and captivating colour, with our new creative philosophy visible at every turn. We have three key materials – brass, travertine stone and textiles – and the way we use these materials represents bold pieces of art and creates a unique atmosphere.

Soothing travertine stone functions as a plinth, supporting the floating seats and central spine. It inspires the rich layered tonal colour palette of the interior. Woven textiles add to the sense of craftsmanship. A tactile wool blend, inspired by handwoven yarns, envelops the two seats, sound bar and flooring.

Tom Holden, Chief Interior Designer, Jaguar, said, “Just as on the outside, deployable technologies are a hallmark of the interior. Screens glide silently and theatrically from the dashboard, while powered stowage areas slide open softly on demand, revealing hidden splashes of exuberant colour. We believe technology should enhance the modern luxury experience, not dominate the architecture, and the digital screen at the centre of the dashboard is an example of this philosophy. The Clearsight display replaces the traditional rear-view mirror, improving overall visibility.”

A sensory experience

Type 00 is an experience for the senses. Its body-harmonised glazed roof casts a subtle pattern onto the materials inside, bringing textures to life and changing their character throughout the day.

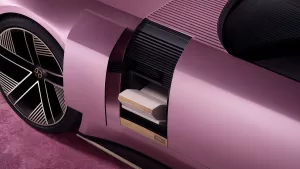
Jaguar’s design team explored new ways of enhancing the interior. Occupants can tailor the cabin to suit their mood using the uniquely crafted Prism case. The objective of this feature is for occupants to engage with the vehicle and extend the concept of customisation and personalisation. It stows behind an exquisitely engineered powered door on the bodyside and contains three totems of natural materials – Brass, Travertine and Alabaster.

Placing one of the totems inside the centre console tailors the mood of the interior. Everything, from the ambient lighting and unique soundscape to the tailored screen graphics, reflect the properties of the chosen material. Bespoke scents interact with the materials for unprecedented personalisation.

This exuberant and artistic approach to engaging the senses extends to the display screens, where animations are formed through the creative technique of ‘Chiaroscuro’ – using light and shadow to define three-dimensional objects.

Symbols of change

Type 00 showcases Jaguar’s new identity with powerful symbols of the change highlighting the transformation, all inspired by Jaguar’s precious provenance. These include:

Device mark: Jaguar’s signature.

A celebration of modernism – geometric form, symmetry and simplicity. Inspired by Malcolm Sayer, Jaguar’s designer of the C, D and E-type who uniquely blended science and art to produce timeless shapes in these cars. The geometric letter forms are rotated to create perfect visual symmetry and balance. It creates a modernist form that spells out the distinguished Jaguar name.

Maker’s marks: The Jaguar ‘leaper’ and monogram.

The ‘leaper’ is a precious mark of provenance. Now, always leaping forward – it is a signpost of our forward-facing outlook and a representation of excellence. It is the hallmark of the brand, as it has been since the beginning.

The new monogram replaces the ‘Growler’ that represented the sound of combustion engines of the past. The new monogram is a discreet artistic motif that incorporates the ‘j’ and the ‘r’ from opposite ends of the device mark. The term ‘opposite’ signifies our approach to do things differently and defy electric vehicle convention.

Strikethrough: This bold linear graphic generates a presence and an immediately recognisable visual for Jaguar and symbolises striking through imitation and the ordinary.

Exuberant colours: The exuberant and bold use of colour is a cornerstone of Jaguar’s new brand identity, embedded in its association with art. Always presented with texture or movement.

Artistic endeavour

Jaguar has earned a reputation for original thinking inspired by the singular vision of founder, Sir William Lyons, who believed that Jaguar should be a ‘copy of nothing’ and that its cars should be considered as artforms.

Jaguar showcased its creative reimagining at Miami Art Week with a series of curated gallery spaces in two locations. As title sponsor of Art Miami, it presented ‘Jaguar. Exuberance.’ – an immersive exploration of its dramatic new visual language featuring original works by British artists. Then, at the fashion and architectural playground of Miami Design District, Jaguar unveiled its ‘Copy Nothing’ installation for the public global debut of Type 00.

Rawdon Glover, Managing Director, Jaguar, “Our presence at Miami Art Week emphasises Jaguar’s purpose as an advocate for art and creativity in all its forms. We know that art is a passion point for our future clients, so what better way than to go and talk to them directly, at one of the world’s premier art festivals”.

Media Release Source: Jaguar South Africa

- Advertisement -