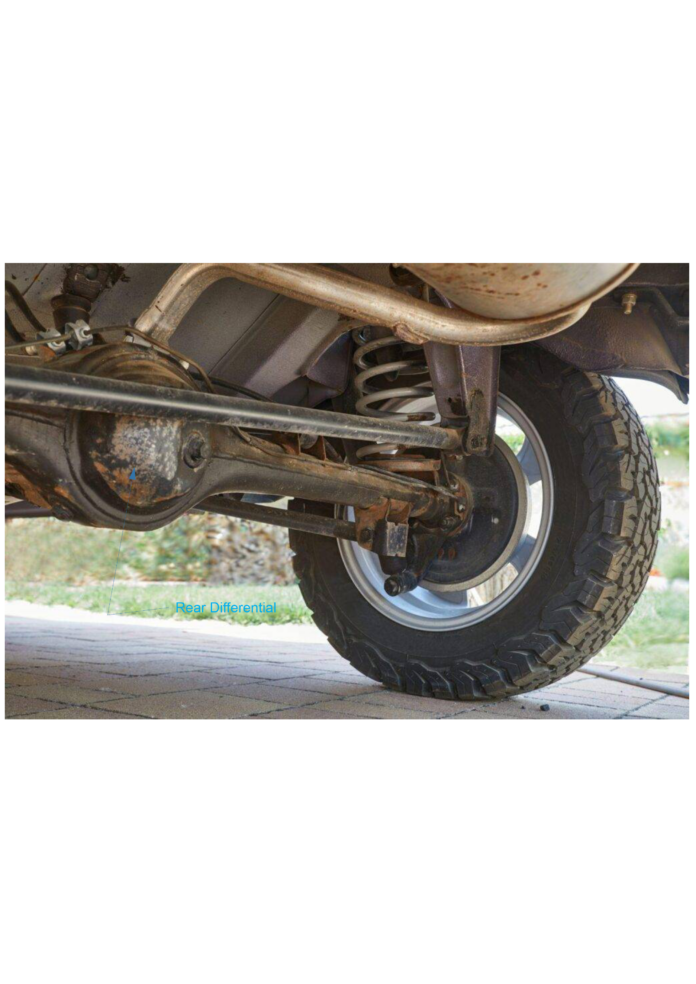
The differential fluid also known as gear oil, lubricates the gears and bearings within the differential, reducing friction and wear. It also distributes power efficiently to the wheels for smooth turns and optimal traction. This lubrication minimizes heat generation, preventing damage from excessive temperatures. Furthermore, the fluid acts as a sealant, preventing contaminants like dirt and water from entering the differential housing and causing damage.
Assessing Your Differential Fluid’s Condition
Before embarking on a fluid change, you need to assess the current condition of your differential fluid. This involves a simple visual inspection and a check of its consistency. Locate the differential drain plug, usually found on the bottom of the differential housing – consult your vehicle’s owner’s manual for the precise location. Carefully remove the filler plug first (often located near the top of the housing). This is crucial to avoid overfilling once the fluid is drained.
When to Seek Professional Help
Some situations necessitate professional help. If you observe any of the following, consult a qualified mechanic immediately:
Significantly low fluid level: This points to a leak that needs immediate repair to prevent disastrous damage.
Fluid showing signs of significant contamination (water, metallic particles): This indicates potential internal damage requiring expert diagnosis and repair.
Unusual noises or vibrations emanating from the differential: These could signify a range of problems, from worn gears to bearing failures.
Burnt smell or excessively dark fluid: This signifies potential overheating and possible damage.
Gathering Necessary Supplies
Once you’ve determined the condition of your differential fluid and decided on a change, you’ll need to gather the necessary supplies. This includes:
New differential fluid: Purchase the correct type and quantity of fluid specified in your owner’s manual. Using the wrong type of fluid can damage your differential. New differential fluid is typically a reddish-amber color.
Drain pan: A suitable container large enough to hold the old fluid.
Wrenches: The correct sized wrenches for both the drain and filler plugs.
Funnel: A funnel will prevent spills during refilling.
Jack and jack stands (or ramps): To safely lift your vehicle and provide secure access to the differential.
Gloves and safety glasses: Always prioritize your safety. Used differential fluid can be messy and potentially harmful.
Torque wrench (recommended): To ensure the drain and filler plugs are tightened to the manufacturer’s specifications. Over-tightening can damage the threads; under-tightening can lead to leaks.
Towels or rags: To clean up any spills.
Changing Your Differential Fluid: A Step-by-Step Guide
Before you begin, ensure your vehicle is parked on a level surface, the engine is off, and the parking brake is engaged.
Securely lift your vehicle: Use a jack and jack stands, or ramps to lift the vehicle safely. Ensure it is stable and secure before proceeding. Never work under a vehicle supported only by a jack.
Locate and remove the drain plug: Position the drain pan beneath the drain plug and carefully loosen and remove the plug, allow the old fluid to drain completely. Dark, murky or metallic-looking fluid indicates significant wear and contamination, necessitating an immediate fluid change. A gritty or foul-smelling fluid further points to internal damage, requiring professional inspection.
Remove the filler plug: This is essential to allow air to escape as the fluid drains.
Inspect the drain plug and magnetic drain plug (if equipped): Check for any metal particles or debris, which may indicate internal wear. Clean the plug before reinstalling.
Replace the drain plug: Once the old fluid has drained, replace the drain plug. It’s crucial to tighten it to the proper torque specification, as specified in your owner’s manual. Using a torque wrench prevents over-tightening or under-tightening, both of which can lead to leaks or damage.
Refill with new fluid: Using a funnel, carefully pour the correct amount of new differential fluid into the filler hole. Refer to your owner’s manual for the precise quantity.
Check the fluid level: Once filled, you might need to use a fluid level checker or simply check the level via the fill hole. The fluid level should reach the fill hole or slightly below it, depending on your vehicle’s specifications.
Replace the filler plug: Tighten the fill plug to the manufacturer’s specified torque.
Lower your vehicle: Carefully lower your vehicle and remove the jack and stands.
Dispose of used fluid properly: Used differential fluid should be disposed of according to local regulations. Never pour it down the drain or onto the ground.
Post-Fluid Change Inspection: After driving for a short distance, re-check for any leaks around the drain and fill plugs. Listen for any unusual noises emanating from the differential. If you notice any leaks or unusual sounds, consult a mechanic immediately.
Regular Maintenance is Key
Regularly checking and changing your differential fluid is an essential part of responsible vehicle ownership and simultaneously maintaining the health and longevity of your vehicle’s drivetrain. Consult your owner’s manual for the recommended fluid change intervals and significantly extend the life of your differential and ensure trouble-free driving for years to come. Nonetheless, if you are uncomfortable performing this task yourself, seek professional assistance from a qualified mechanic.


